Interior painting that lasts begins long before the first coat of paint is applied. Proper surface preparation determines how well paint adheres, how evenly it spreads, and how durable the finish will be over time. When walls are not correctly prepared, issues such as peeling, uneven texture, and premature fading can occur, leading to unnecessary repairs. Professionals follow a structured approach that includes cleaning, repairing, smoothing, and priming surfaces to create a stable base.
Each step builds toward a consistent finish that enhances the appearance of interior spaces while extending the lifespan of the paint application in residential environments overall.
Key Preparation Stages Ahead
-
Assessing Wall Conditions
Before any surface treatment begins, a careful evaluation of the wall condition helps determine the level of work required. This stage involves observing visible flaws such as stains, dents, nail holes, and areas where previous coatings may have deteriorated. Moisture marks and subtle uneven textures can also indicate deeper issues that need attention before paint is applied. By identifying these conditions early, painters can plan appropriate corrective steps that support a smoother finish later. This assessment also helps in selecting suitable materials for repairs and ensuring that no underlying problems are hidden beneath new paint layers.
In many cases, this step prevents future complications that could shorten the lifespan of the paint job. A thorough inspection allows for a more organized workflow, reducing interruptions during later stages of preparation and helping maintain consistency across all interior surfaces that will eventually receive coating. This contributes to a more reliable foundation for subsequent steps.
-
Cleaning and Degreasing Surfaces
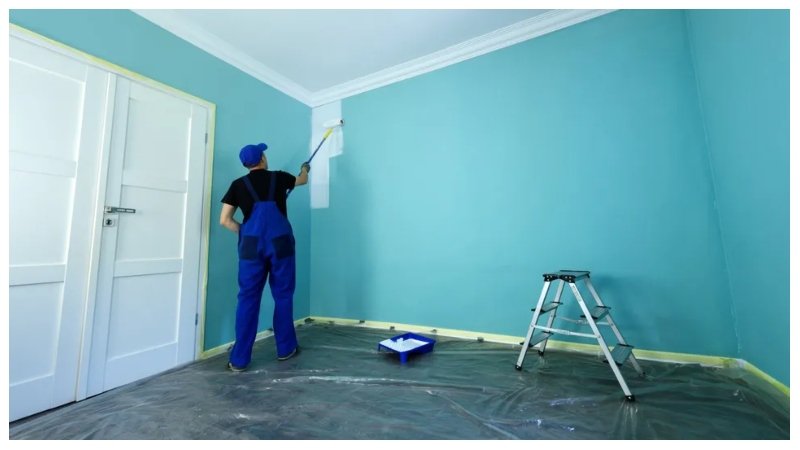
Surface cleaning plays a central role in ensuring that paint bonds effectively to interior walls. Dust, grease, and airborne particles often accumulate over time, forming a layer that can interfere with adhesion. Removing these contaminants requires careful washing techniques that address both visible and hidden residues. In kitchens and high-traffic areas, this step becomes even more important due to frequent exposure to oils and moisture. A house painter in Richmond often begins this phase by selecting appropriate cleaning solutions that break down buildup without damaging existing wall materials.
Once surfaces are cleaned, they are allowed to dry fully to prevent moisture from becoming trapped beneath paint layers. This drying period is essential because even small amounts of retained moisture can compromise the finish. Proper cleaning ensures that subsequent preparation steps proceed smoothly and that the paint adheres evenly across all treated areas for a consistent appearance. Proper cleaning also supports overall surface readiness for later stages of work.
-
Repairing Cracks and Imperfections
Cracks, holes, and surface irregularities can disrupt the final appearance of painted interiors; repairing work an essential part of preparation. These imperfections may result from settling structures, previous installations, or general wear over time. Filling compounds and patching materials are applied to restore a uniform surface, ensuring that the wall is structurally ready for new coatings. Careful attention is given to blending repaired areas, so they align seamlessly with surrounding surfaces. Once applied, materials must be allowed to set fully before any sanding or further treatment takes place.
This step helps prevent visible lines or uneven textures from appearing after painting is complete. Proper repair work contributes significantly to the smoothness and visual consistency of interior walls, reducing the likelihood of noticeable flaws once paint is applied across larger sections of space. These efforts ensure a stable surface ready for finishing layers of paint application. This step also reduces the chance of future surface breakdown under normal indoor conditions.
-
Sanding for Smooth Foundations
Proper sanding helps refine wall surfaces after repairs have been completed, creating an even texture that supports consistent paint application. This stage involves using sanding materials of varying coarseness to gradually remove raised edges, filler excess, and minor surface inconsistencies. The process is carried out with careful attention to avoid creating new imperfections or damaging surrounding areas. As sanding progresses, the surface becomes increasingly uniform, allowing light to reflect evenly once paint is applied. Dust generated during sanding must be addressed thoroughly, as leftover particles can affect adhesion and final appearance.
This step also prepares the wall for primer application by ensuring that no rough patches remain. A smooth foundation achieved through controlled sanding contributes to a cleaner finish and reduces the likelihood of visible irregularities after painting is complete across interior environments. This stage is critical for achieving consistent surface quality before coating begins. It also improves overall paint bonding across treated areas.
-
Priming for Adhesion Strength
Priming creates a bonding layer between the prepared surface and the paint, helping improve durability and consistency of the finish. This stage is essential for surfaces that have been repaired, sanded, or previously coated with uneven layers. Primer helps seal porous areas, ensuring that paint does not absorb unevenly into the wall. It also enhances color uniformity and reduces the number of coats required for full coverage. Application must be done evenly, with attention to corners and edges where absorption rates may differ. Once applied, the primer must dry completely before additional paint layers are introduced. This drying phase allows the surface to stabilize and prepares it for final finishing.
Proper priming supports long-term performance of interior paint by creating a reliable base that improves adhesion and helps maintain a consistent appearance throughout the painted space. This step also minimizes absorption inconsistencies across different wall materials. It contributes to a more uniform and stable paint foundation overall.
-
Masking and Protecting Areas
Masking protects surrounding elements such as trim, flooring, and fixtures during surface preparation and painting. This step ensures that unintended contact with cleaning agents, sanding dust, or paint is minimized. Protective coverings are carefully applied to edges, corners, and adjacent surfaces to maintain a controlled working environment. Attention is given to securing materials so they remain in place throughout all preparation stages. This helps prevent accidental damage and reduces cleanup time once the painting process is complete. Masking also supports precision by clearly defining the boundaries of the areas being treated.
Proper protection contributes to a more organized workflow and helps maintain the condition of interior features that are not intended to be painted. Once all preparation work is finished, coverings are removed carefully to reveal clean edges and untouched surfaces beneath. This ensures final readiness before primer and paint application begins across treated areas. Care is taken throughout the process.
Careful surface preparation plays a decisive role in achieving interior paint results that remain consistent and visually stable over time. Each stage, from initial assessment to final inspection, contributes to building a foundation that supports adhesion and durability. When surfaces are properly cleaned, repaired, sanded, primed, and protected, the finish becomes more even and resistant to early wear. Attention to detail during preparation reduces the likelihood of future corrections and enhances the overall appearance of interior spaces.
A structured approach to these steps ensures that paint performs as intended, maintaining its quality and smoothness across different environments for years ahead. Click here for more information.